How To Tile Over A Painted Brick Fireplace: Expert Tips
To tile over a painted brick fireplace, first clean and sand the surface. Then, apply a bonding primer for better adhesion.
Tiling over a painted brick fireplace can transform your living space. Proper preparation is crucial for successful tiling. Start by cleaning the brick thoroughly to remove dirt and grease. Sand the surface to create a rough texture for the tile adhesive to grip.
Apply a high-quality bonding primer to ensure the tiles stick well. Choose suitable tiles that complement your room’s decor. Use a notched trowel to spread tile adhesive evenly and press the tiles firmly into place. Once set, grout the tiles and clean the surface. This process revitalizes your fireplace, adding a modern touch to your home.
Preparation Steps
Tiling over a painted brick fireplace can transform your living space. Proper preparation is crucial for a durable and beautiful finish. Follow these steps to ensure your fireplace is ready for tiling.
Clean The Surface
Start by cleaning the brick surface thoroughly. Dust, dirt, and grease can prevent tiles from adhering properly.
- Use a vacuum to remove loose dirt and dust.
- Scrub the brick with a stiff brush and soapy water.
- Rinse well and let the surface dry completely.
Assess The Paint Condition
Check the condition of the paint on the bricks. This will determine the next steps.
| Paint Condition | Action Needed |
|---|---|
| Peeling or Flaking | Remove loose paint with a scraper. |
| Intact and Smooth | Lightly sand the surface. |
After sanding, wipe the bricks with a damp cloth. This removes dust and ensures a clean surface.
Choosing The Right Tiles
Choosing the right tiles for your painted brick fireplace is crucial. It affects both the look and longevity of the renovation. The right tiles can add charm and elegance. They also ensure durability and heat resistance.
Types Of Tiles
Different types of tiles are available for fireplace projects. Each type offers unique benefits.
- Ceramic Tiles: These are affordable and come in many designs. They are easy to clean and maintain.
- Porcelain Tiles: Porcelain tiles are more durable than ceramic. They withstand higher temperatures.
- Natural Stone Tiles: These tiles provide a rustic and natural look. They include options like marble, granite, and slate.
- Glass Tiles: Glass tiles add a sleek and modern touch. They are easy to clean and reflect light beautifully.
Color And Design Considerations
Color and design play a vital role in the overall look. They should complement your home’s style.
- Neutral Colors: Colors like beige, white, and gray offer a timeless look. They fit well with most interiors.
- Bold Colors: Colors like red, blue, and green make a statement. Use them for a vibrant and lively fireplace.
Design patterns also matter. Choose patterns that match your room’s aesthetic.
- Subway Tiles: Subway tiles provide a classic and clean look. They are simple yet elegant.
- Mosaic Patterns: Mosaic tiles offer intricate and artistic designs. They are perfect for a standout feature.
- Chevron and Herringbone: These patterns add a dynamic and stylish touch. They are trendy and eye-catching.
Consider the tile texture. Smooth tiles are easier to clean. Textured tiles add depth and interest.
Choosing the right tiles ensures your fireplace is both beautiful and functional. Make a choice that balances aesthetics and practicality.
Essential Tools And Materials
Before you can tile over a painted brick fireplace, surface priming is crucial. Priming ensures the tiles stick properly and last longer. It creates a smooth and even base for your tiles.
Applying Primer
Begin by cleaning the painted brick surface. Remove any dust, dirt, or loose paint. Use a wire brush for tougher spots. Once clean, apply a high-quality masonry primer. Use a paint roller for large areas and a brush for edges and corners.
- Clean the surface thoroughly
- Use a wire brush for stubborn areas
- Apply primer with a roller and brush
Make sure the primer covers every part of the brick. This ensures the tiles will stick well. Apply the primer evenly to avoid any lumps.
Drying Time
Drying time for primer is crucial. Check the manufacturer’s instructions for specific drying times. Typically, it takes about 24 hours for primer to dry completely.
| Step | Time |
|---|---|
| Initial Drying | 4-6 hours |
| Complete Drying | 24 hours |
Ensure the primer is fully dry before starting the tiling process. This prevents any issues with tile adhesion. Touch the surface to check if it is dry and firm.
By following these steps, you ensure a solid foundation for your tiles. This guarantees a long-lasting and beautiful tiled fireplace.

Credit: themorrismansionblog.com
Surface Priming
Planning to tile over a painted brick fireplace requires careful measuring and planning. Proper measurements ensure you buy the right amount of materials. Planning helps you achieve a professional look.
Measure The Area
Start by measuring the width and height of the fireplace. Use a measuring tape for accuracy. Note down the measurements in inches or centimeters.
| Area | Measurement |
|---|---|
| Width | ______ |
| Height | ______ |
Calculate the total area by multiplying the width by the height. This gives you the square footage or square meters. Add 10% extra for waste and cuts.
Layout Planning
Plan the layout of your tiles before you start. Lay tiles on the floor to see the pattern. Adjust the tiles to minimize cuts and gaps. Make sure to use a level to keep the lines straight.
- Lay tiles on a flat surface
- Check for symmetry
- Use spacers for even gaps
Mark the center of the fireplace. This helps you align the tiles symmetrically. Begin tiling from the center and work towards the edges. This keeps the design balanced.
Consider the type of tile you are using. Different tiles have different sizes and shapes. Ensure your layout complements the design and style of your room.
Measuring And Planning
Proper tile adhesion is crucial for tiling over a painted brick fireplace. This ensures the tiles stay in place and look great. The right technique and materials make all the difference.
Mixing The Adhesive
First, you need to mix the tile adhesive correctly. Follow the instructions on the adhesive package. Use a clean bucket and a paddle mixer for best results.
Gradually add water to the adhesive powder. Mix until you get a smooth consistency. There should be no lumps in the mixture. Proper mixing ensures strong adhesion.
| Step | Action |
|---|---|
| 1 | Read the adhesive instructions. |
| 2 | Use a clean bucket and paddle mixer. |
| 3 | Gradually add water to the powder. |
| 4 | Mix until smooth. |
Applying The Adhesive
Next, apply the adhesive to the painted brick surface. Use a notched trowel for even application. Hold the trowel at a 45-degree angle.
Spread the adhesive in small sections. Cover only enough area for a few tiles at a time. This prevents the adhesive from drying too quickly.
Press each tile firmly into the adhesive. Ensure there are no gaps or air bubbles. This will help the tiles adhere properly and last longer.
- Use a notched trowel.
- Apply adhesive in small sections.
- Press tiles firmly.
- Check for gaps and bubbles.
Credit: www.johnbridge.com
Tile Adhesion
Once you have prepped your painted brick fireplace, it’s time to install the tiles. Follow these steps for a successful tile installation, ensuring your fireplace becomes the centerpiece of your room.
Placing The Tiles
First, apply a thin layer of tile adhesive to the surface. Use a notched trowel for even application. This ensures the tiles stick properly.
Begin placing tiles at the bottom center of the fireplace. This method helps maintain symmetry. Press each tile firmly into the adhesive. Use spacers to keep consistent gaps between tiles.
Continue placing tiles row by row. Check periodically to ensure they are level. Adjust as needed before the adhesive dries.
Cutting Tiles To Fit
Measure the areas where full tiles do not fit. Mark the tiles for cutting using a pencil.
Use a tile cutter to cut the tiles to the required size. For complex cuts, use a wet saw. Wear safety goggles and gloves to protect yourself.
After cutting, smooth the edges with a tile file. This prevents sharp edges and ensures a clean finish. Place the cut tiles in their respective spots, pressing them firmly into the adhesive.
| Steps | Tools Needed |
|---|---|
| Apply Tile Adhesive | Notched Trowel |
| Place Tiles | Tile Spacers |
| Measure and Mark | Pencil, Measuring Tape |
| Cut Tiles | Tile Cutter, Wet Saw, Tile File |
- Tip: Wipe off any excess adhesive immediately.
- Tip: Ensure all tiles are level before adhesive sets.
By following these steps, your tiled fireplace will look stunning. Enjoy the transformation of your living space.
Tile Installation
Grouting and sealing are essential steps for tiling over a painted brick fireplace. These steps ensure the durability and look of your new tiled surface. Proper application of grout and sealant will protect your tiles and maintain their beauty for years.
Applying Grout
Start by choosing the right grout for your tiles. Epoxy grout is ideal for fireplaces due to its heat resistance. Mix the grout according to the manufacturer’s instructions. Use a rubber float to apply the grout. Hold the float at a 45-degree angle and spread the grout across the tiles. Push the grout into the joints to fill them completely.
Once the joints are filled, use the edge of the float to scrape off excess grout. Work in small sections to prevent the grout from drying out. After 15-20 minutes, use a damp sponge to clean the tiles. Rinse the sponge frequently to avoid spreading grout haze. Allow the grout to cure for at least 24 hours.
Sealing The Tiles
Sealing the tiles is crucial to protect them from stains and moisture. Choose a sealant that is suitable for your type of tiles. Apply the sealant with a clean, soft cloth or a foam brush. Cover the entire surface of the tiles and grout lines.
Let the sealant sit for the time specified on the product label. This is usually around 10-15 minutes. Then, use a dry cloth to buff off any excess sealant. Reapply the sealant if necessary, especially for high-traffic areas. Allow the sealant to cure for at least 24 hours before using the fireplace.
| Step | Action |
|---|---|
| 1 | Mix the grout |
| 2 | Apply grout with a float |
| 3 | Scrape off excess grout |
| 4 | Clean tiles with a damp sponge |
| 5 | Let grout cure for 24 hours |
| 6 | Apply sealant with a cloth |
| 7 | Buff off excess sealant |
| 8 | Let sealant cure for 24 hours |
By following these steps, your painted brick fireplace will look stunning and last long.
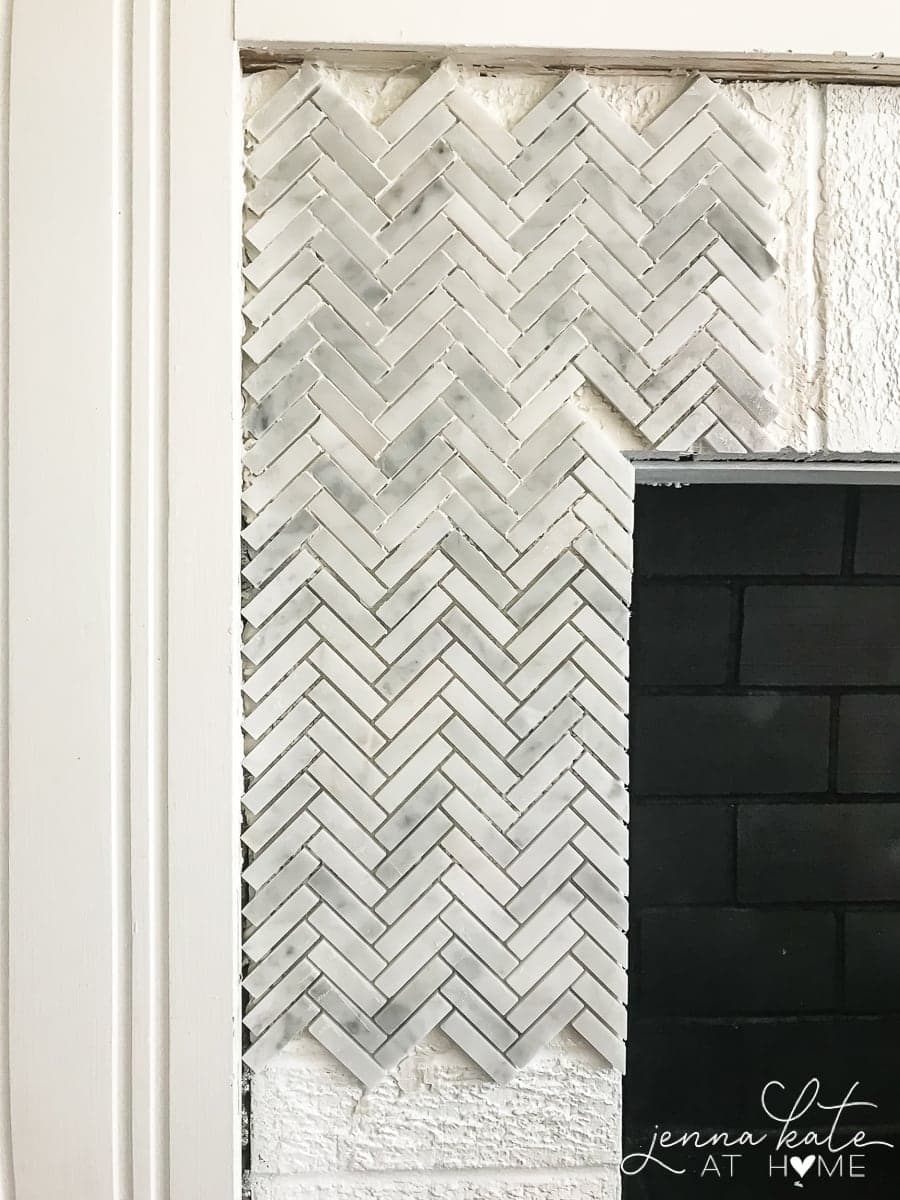
Credit: jennakateathome.com
Grouting And Sealing
After tiling over a painted brick fireplace, the final touches are crucial. These steps ensure a polished, professional look. Below, we discuss two important tasks: Cleaning Excess Grout and Inspecting the Work.
Cleaning Excess Grout
Once the tiles are set, it’s time to clean the grout. Excess grout can make your fireplace look messy. Follow these steps to clean it up:
- Wait for the grout to partially dry.
- Use a damp sponge to wipe away excess grout.
- Rinse the sponge frequently to avoid smearing grout.
- Repeat the process until the tiles are clean.
Make sure to clean the tiles thoroughly. Any leftover grout can harden and become difficult to remove.
Inspecting The Work
After cleaning the grout, inspect your work carefully. Look for any imperfections or gaps. Use the following checklist:
- Check for even grout lines.
- Ensure all tiles are level.
- Look for any loose tiles and secure them.
- Verify that the edges are clean and neat.
If you find any issues, address them immediately. This ensures your fireplace looks perfect and lasts for years.
These final touches make a big difference. They transform your tiled fireplace from a DIY project to a professional-looking centerpiece.
Frequently Asked Questions
Can You Lay Tile Over Painted Brick?
Yes, you can lay tile over painted brick. Ensure the surface is clean, dry, and properly primed for better adhesion.
Can I Put Mortar Over Painted Brick?
Yes, you can put mortar over painted brick. Ensure the paint is not peeling. Clean and roughen the surface for better adhesion.
Can You Put Tile Over A Red Brick Fireplace?
Yes, you can tile over a red brick fireplace to give it a new look and style.
Can You Put Peel And Stick Tile Over A Brick Fireplace?
Yes, you can put peel and stick tile over a brick fireplace. Ensure the surface is clean and smooth.
Conclusion
Tiling over a painted brick fireplace can transform your living space. Follow the steps carefully for a professional finish. With patience and the right tools, you can achieve a stunning result. Enjoy your newly revamped fireplace, adding both style and value to your home.
Happy tiling!